Data Filtering
Searching within your study's data is an important part of your research. Avicenna provides you with a powerful filtering tool that you can use to query your data. Currently, this data filtering is available in the following pages:
- Notifications
- Participation
- Audit Trail
- Activity Responses
To access this feature, while you are at one of the above pages, simply click
on the Filter dropdown, and choose Manage Filters.
In the Manage Filters dialog, you can see the Avicenna's default data filter.
This is the filter that is applied to your data by default. You cannot change
this filter, reename it, nor delete it. But you can create a new Filter and
apply your conditions on it.
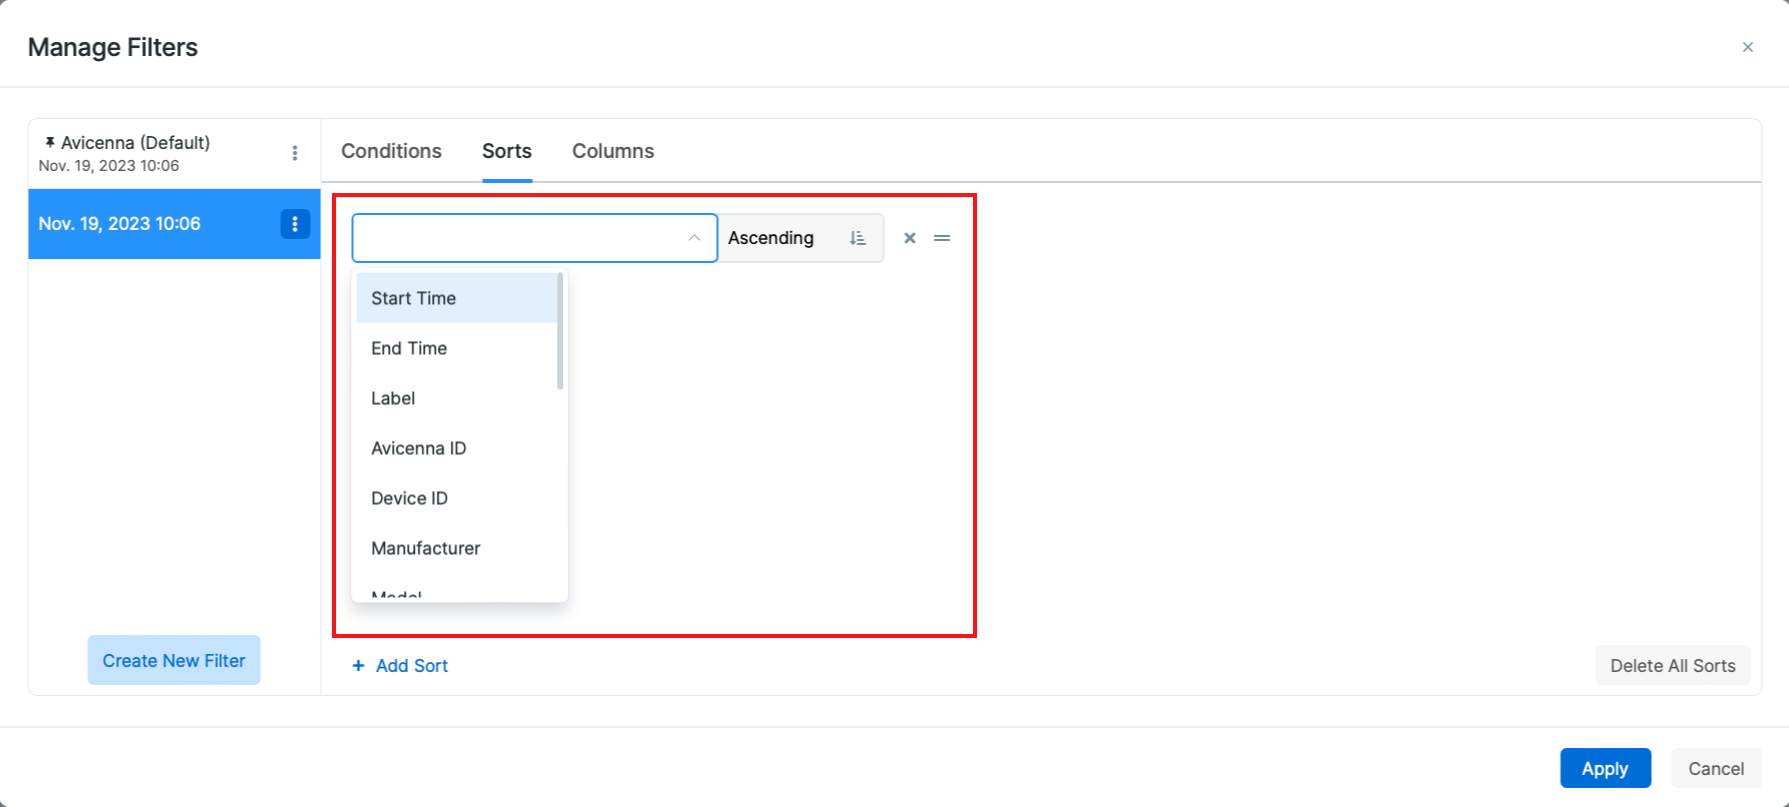
Start by clicking on the Create New Filter to create a new one. On the right
side, you will see three tabs, Conditions, Sorts, and Columns, as shown
in the image below:
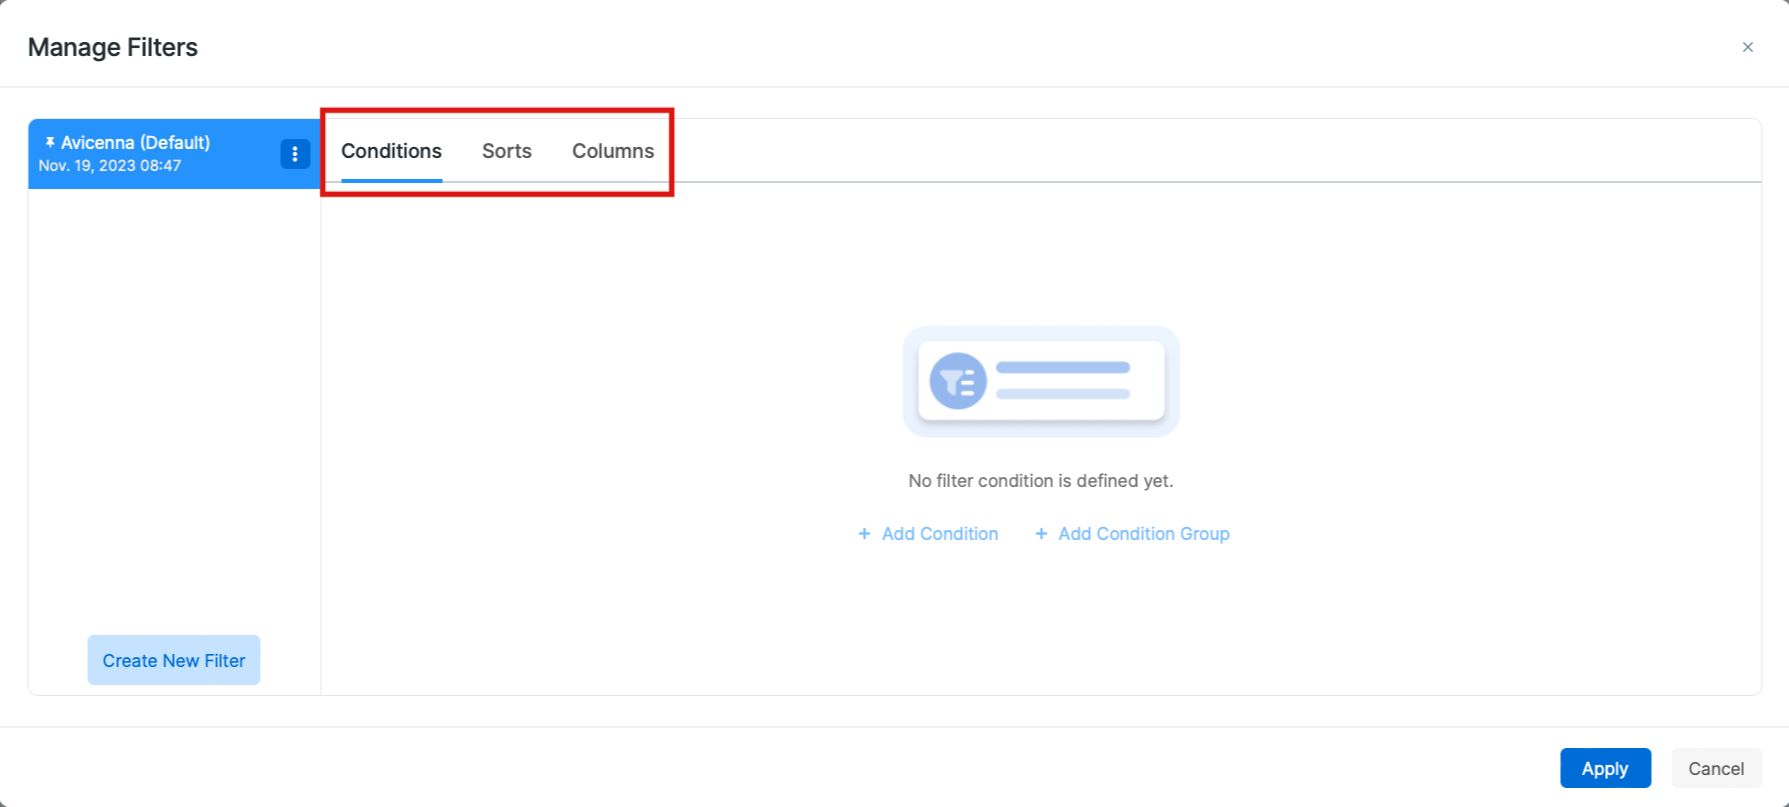
You can use these tabs to create the data report specific to your needs. Below, we explain each of these tabs.
Conditions
A condition defines what data should be included in your search results, based on the selected category, fields, operator, and values. You can add multiple conditions to your filter and even group them together to make your search query more complex. Let's see what are different parts of a condition, and how you can use them to build your filter.
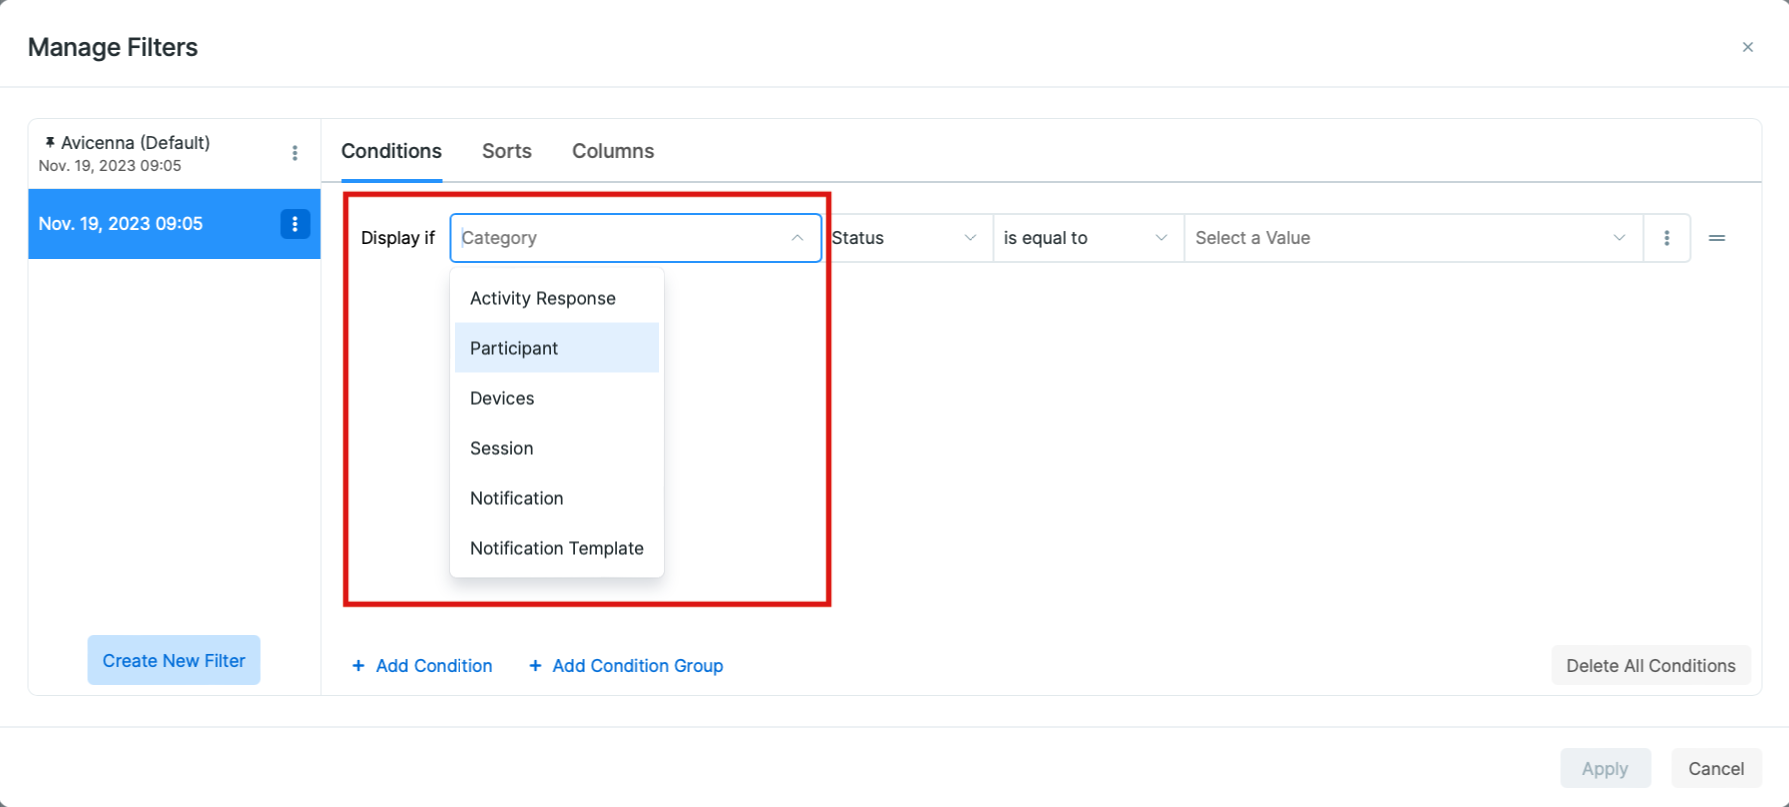
Category: Category is used to group relevant fields together. Based on the page you are visiting on the Researcher Dashboard, you will see different categories. For example, when you are on the Activity Responses page, you will see a list of categories like Activity Response, Participant, Session, and so on.
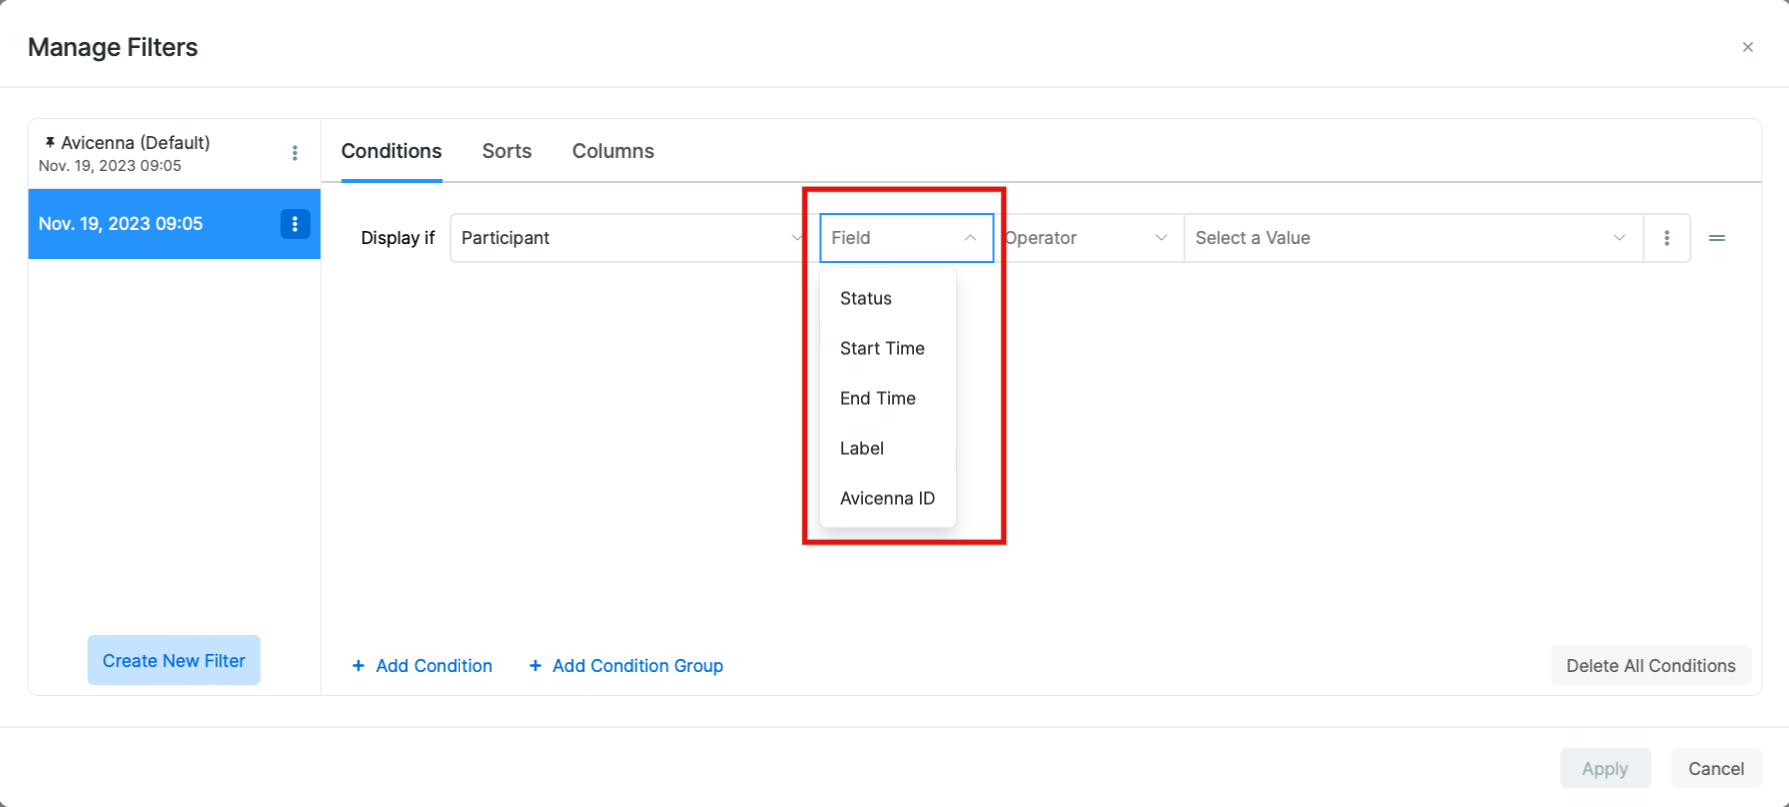
Field: the second drop-down allows you to choose the data field that you want yo use in your filter, for example Avicenna ID, Label, or Status.
Operator: The operator is self-explanatory, and determines the relationship between your field and the value:
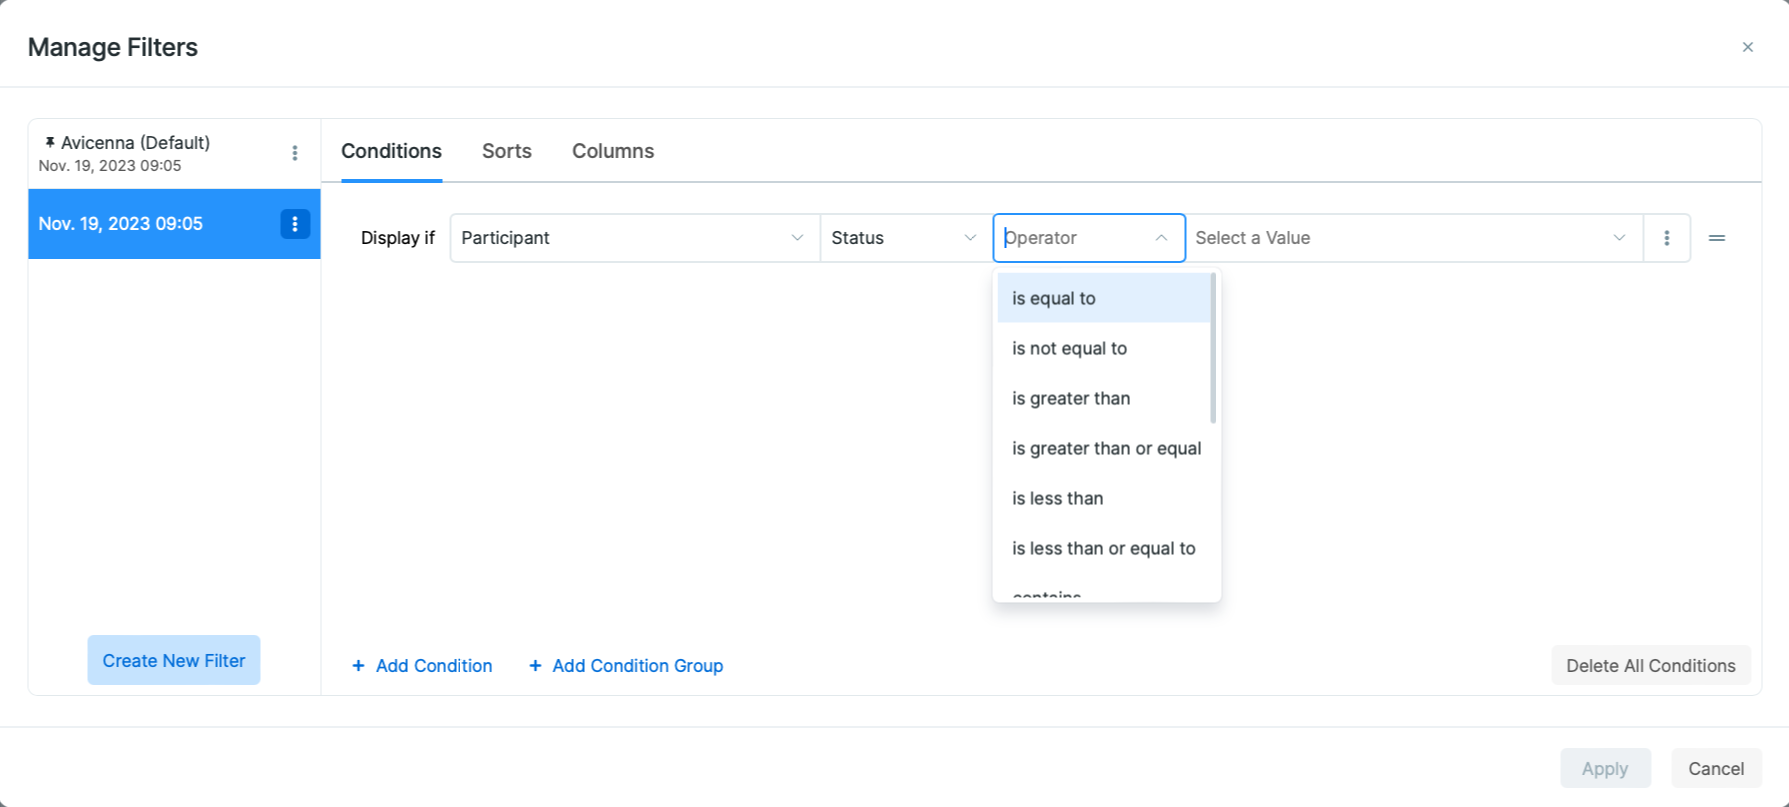
Value: This is the value you want to use in this filter, and can be either a single- or multi-select list, a text, a number, or a date.
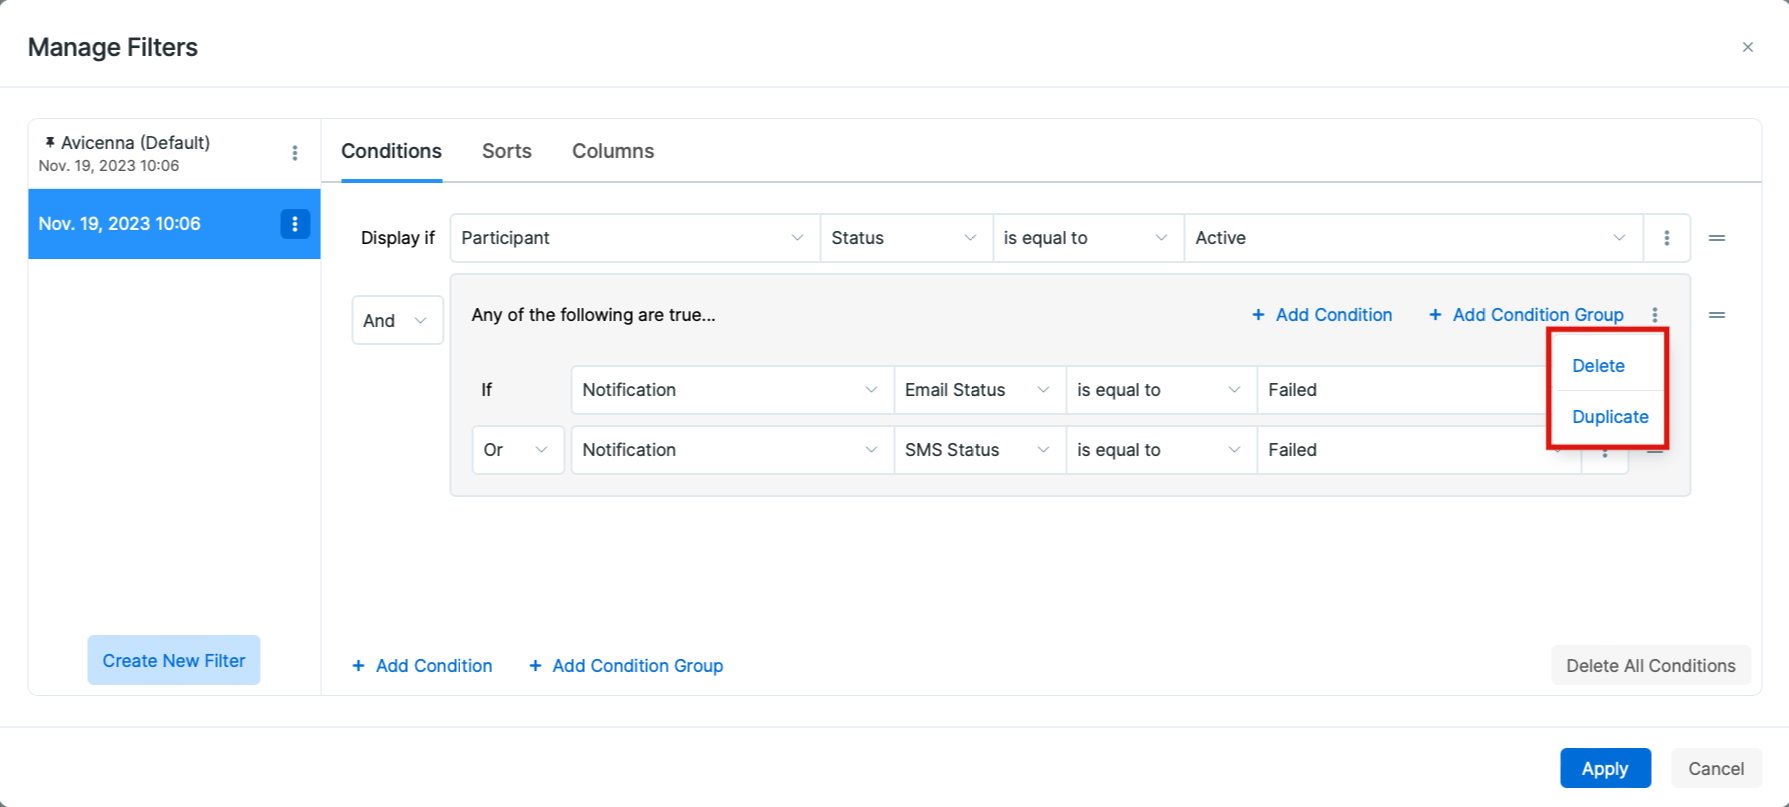
Each condition has a menu on the right side, and a three-line drag-handle next to it. The menu provides the options to delete or duplicate the condition. The drag-handle allows you to rearrange the order of the conditions. This matters if you consider the priority of your conditions.
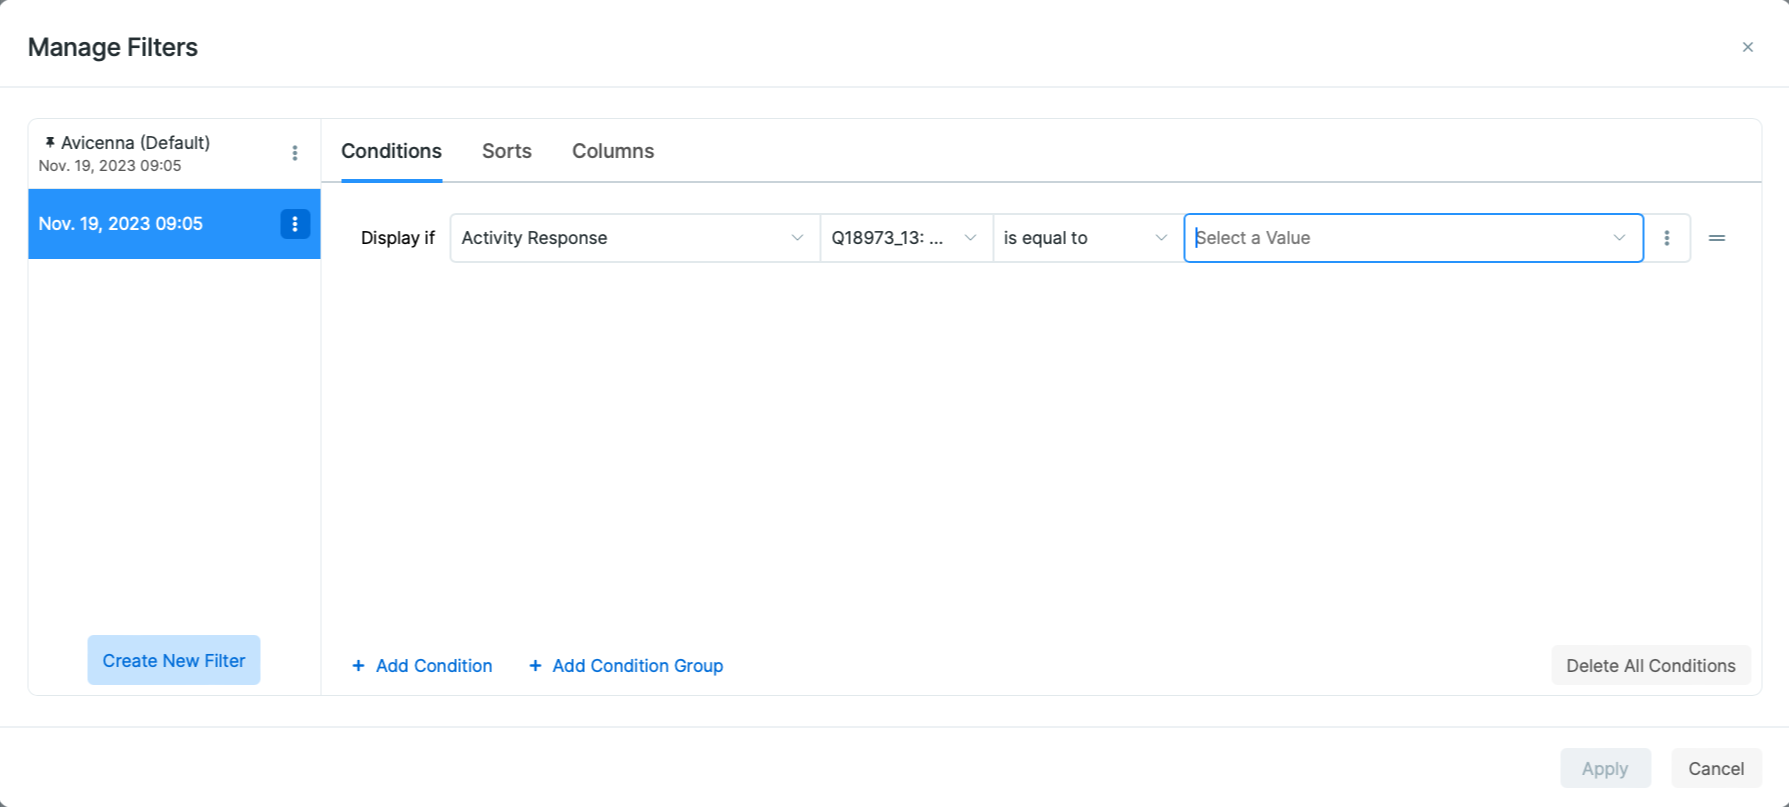
Adding Multiple Conditions and Condition Group
You can have more than one condition in your filter, as shown in the image below:
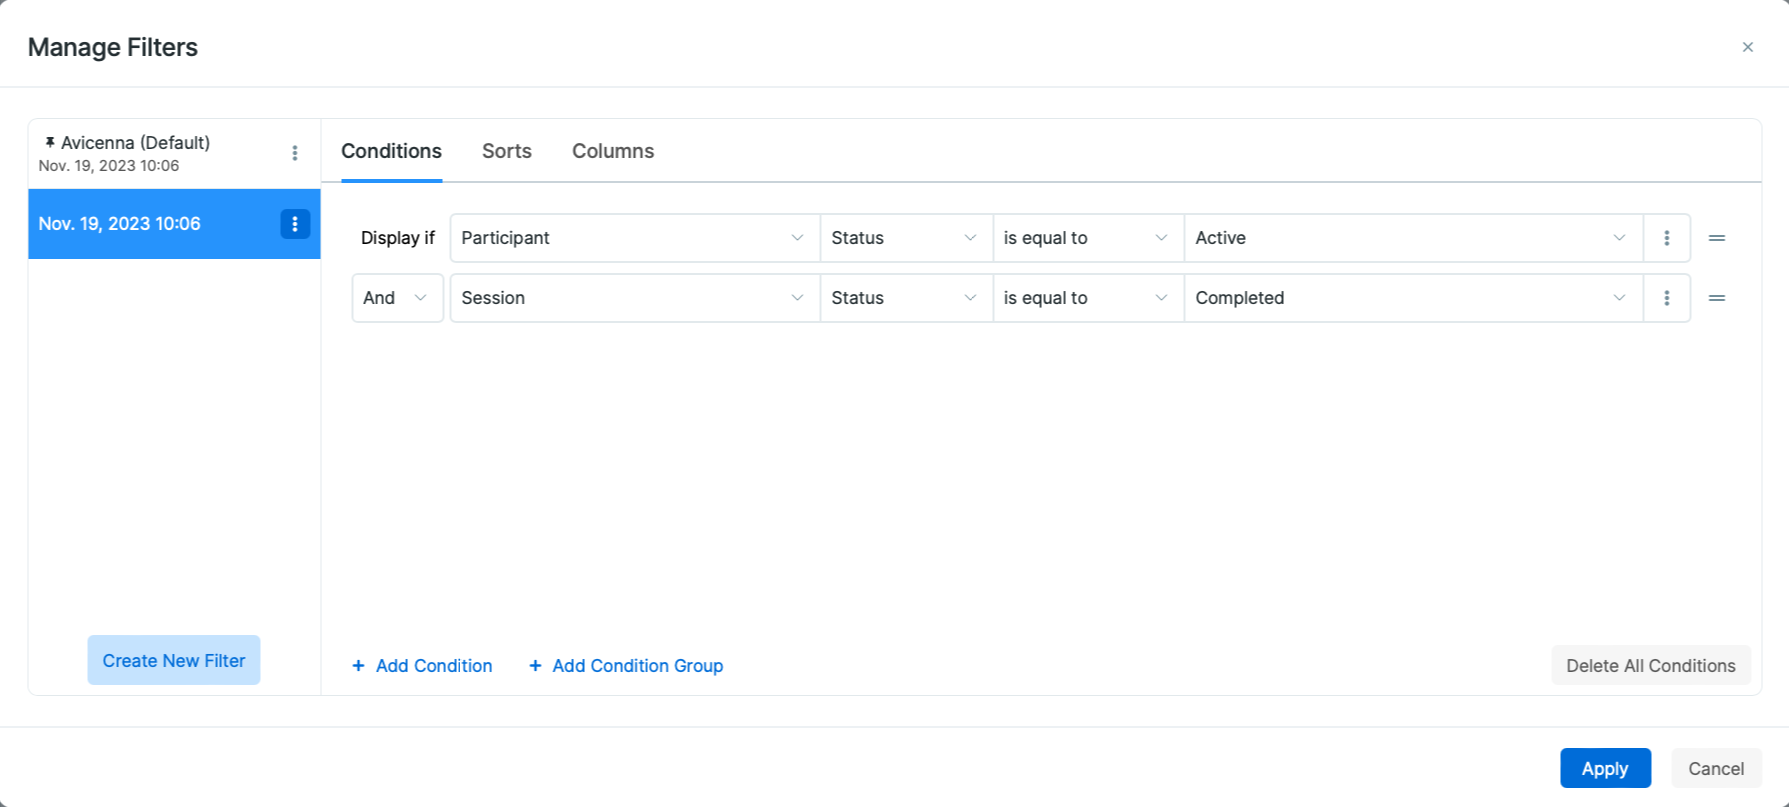
All conditions are either AND together or OR together. If you want to mix
AND and OR in your query, you will need to group your conditions.
As an example, assume you want to query for all active participants in your study for whom either at least one email or at least one SMS notification has failed. In this case, you need define three filters and group them appropriately, as explained below:
- Click on Add Condition and build the first condition. Then select Participant as Category, Status as Field, is equal to for the Operator, and Active for the Value.
- Click on Add Condition Group and make sure that And is selected.
- Click Add Condition inside the new group to build the second condition. For this one, choose Notification for the Category, Email Status for the Field, is equal to for the Operator, and Failed for the Value.
- Click Add Condition inside the new group again and build the final
- condition. Make sure that Or is selected. For this one, you need to select Notification for the Category, SMS Status for the Field, is equal to for the Operator, and Failed for the Value.
- Press Apply.

Aggregation
In certain cases, you may want to aggregate all values of a field and use that
in your filter, rather than using each individual value. For example, you may be
interested in the number of completed sessions, or minimum response to a survey
question. This can be achieved using the Aggregate dropdown for each filter.
Avicenna supports the following aggregation options: Count, Distinct Count,
Minimum, Maximum, Average. Each of these options will be explained below.
Please note that the aggregation option is only available if the data you are filtering contains more than one record of the data you are using in your condition. For example, each survey session has only one status. So if you are filtering survey sessions based on status, you cannot use aggregation. But you can send multiple notifications for each session, and therefore each session can have more than one notifications. So you can use aggregation when using notification as condition in filtering sessions.
As another example, each participant very likely will have more than one survey session. So if you are filtering participants based on their sessions, the system will present you with the aggregation option.
Sort
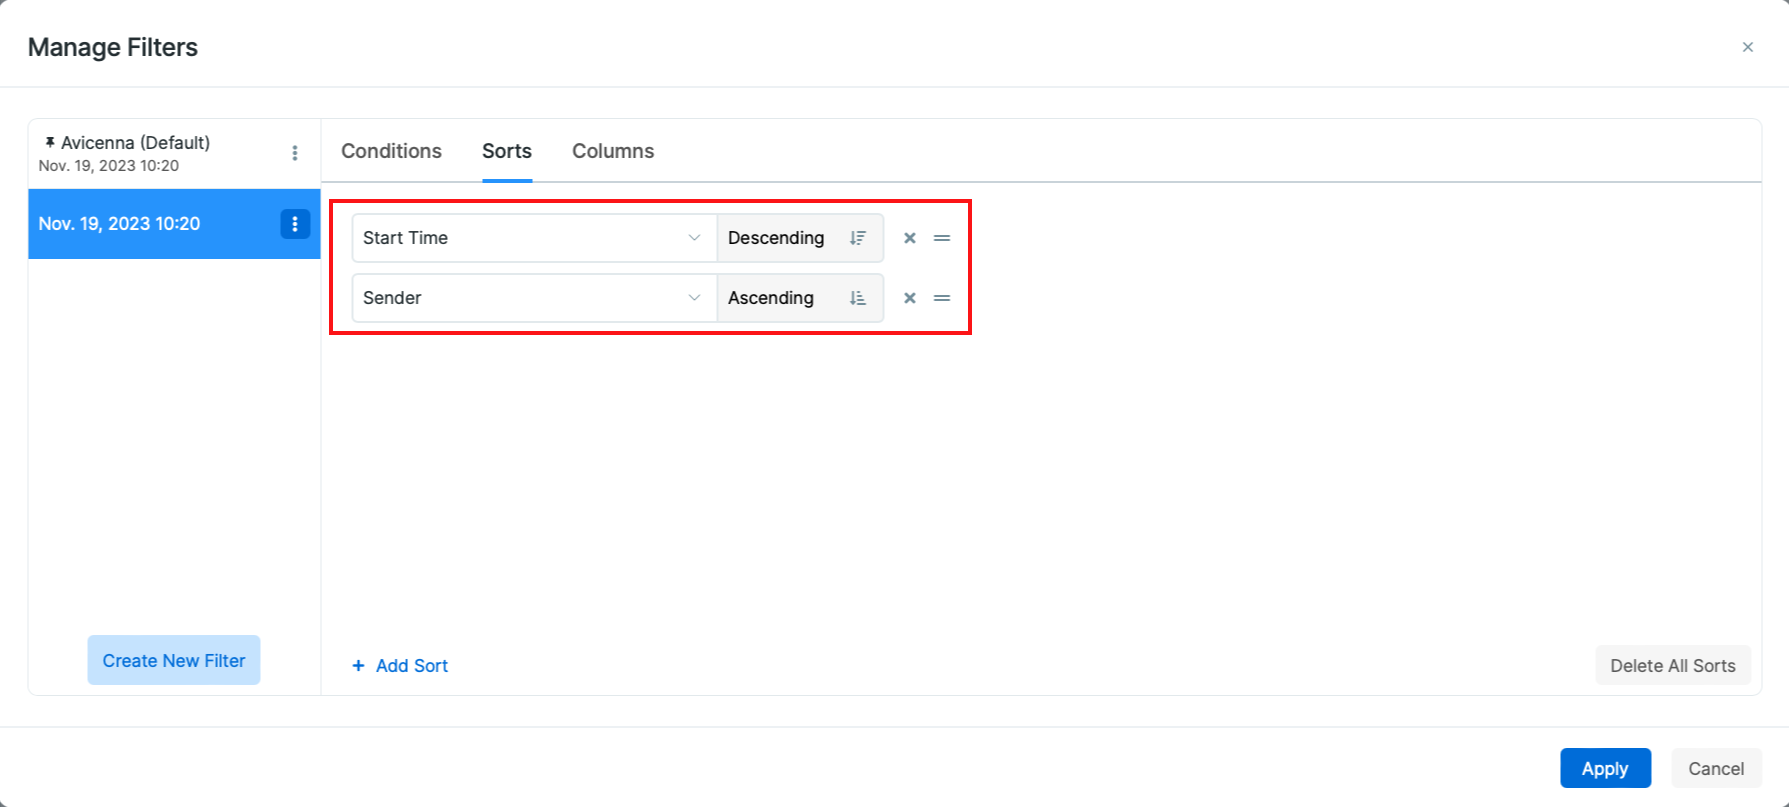
You can sort your data based on one or more field. To choose a field for sorting, in the Sort tab, click on + Add Sort, and then choose your field. You can also choose whether the sort should be done in ascending or descending order.
You can also use the X icon to remove a field from sorting. You can rearrange
the fields you have chosen for sorting by dragging the two-line icon on the
right side of each field. You can also use the Delete All Sorts option to
remove all sorting criteria you had specified.
Columns
The Columns tab lets you customize and choose which columns of the data should
be retrieved and displayed.
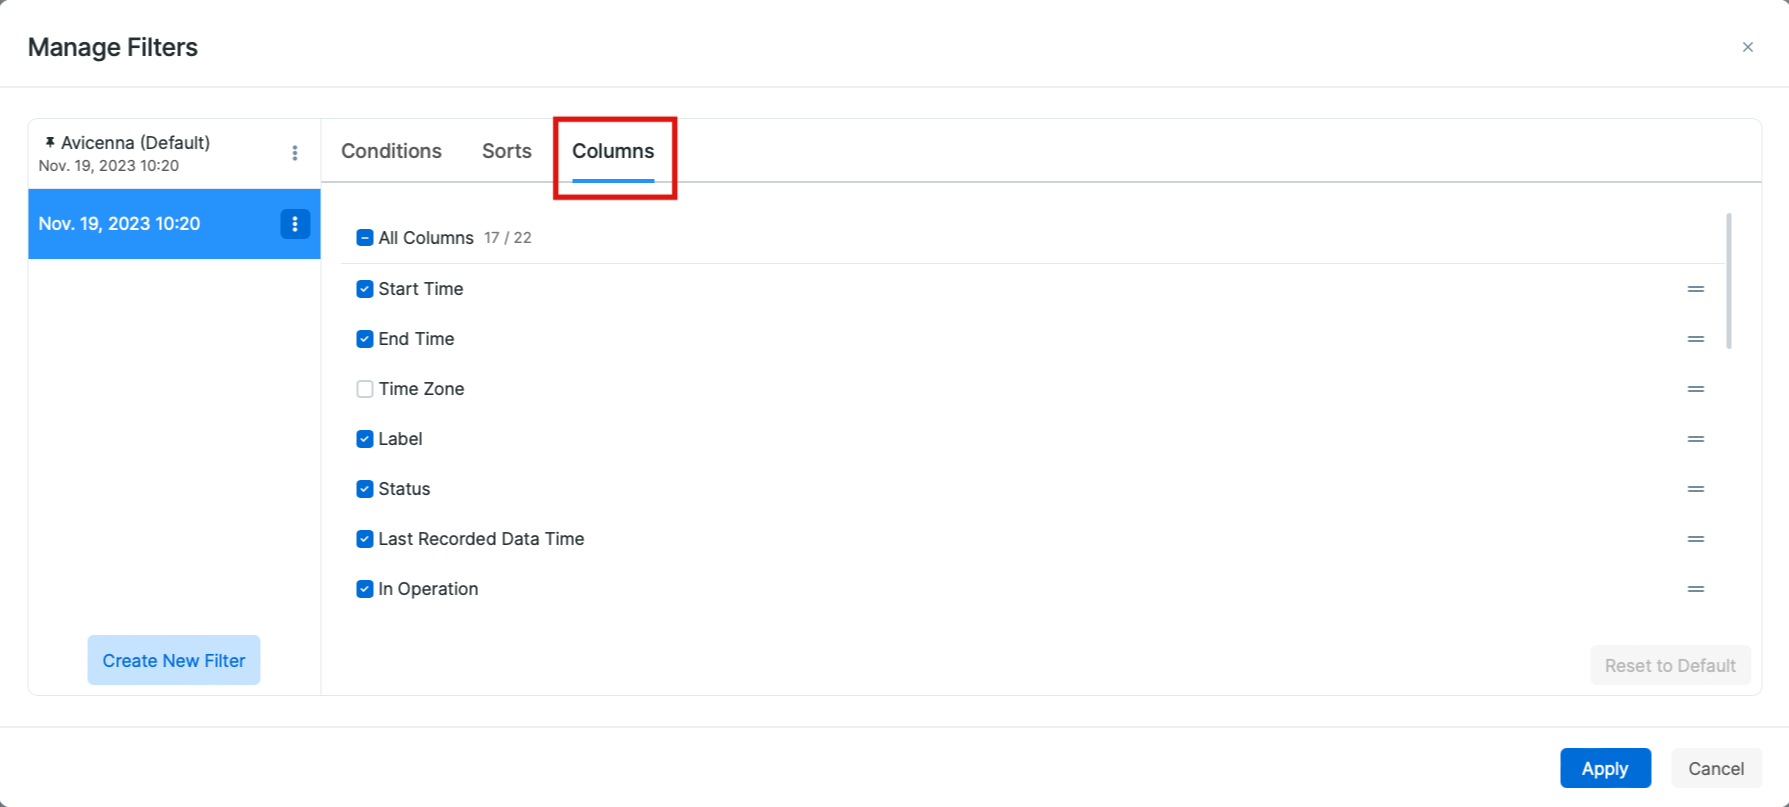
Columns can be easily rearranged with drag-and-drop using the horizontal lines.
You can revert the selected columns in a filter back to their default settings
by clicking on Reset to Defaul under the Columns tab.
Managing Filters
To manage your filter, click on the menu on its right side. This will give you the option to duplicate your filter, export its result as a CSV file, set it as default, rename, or delete it:
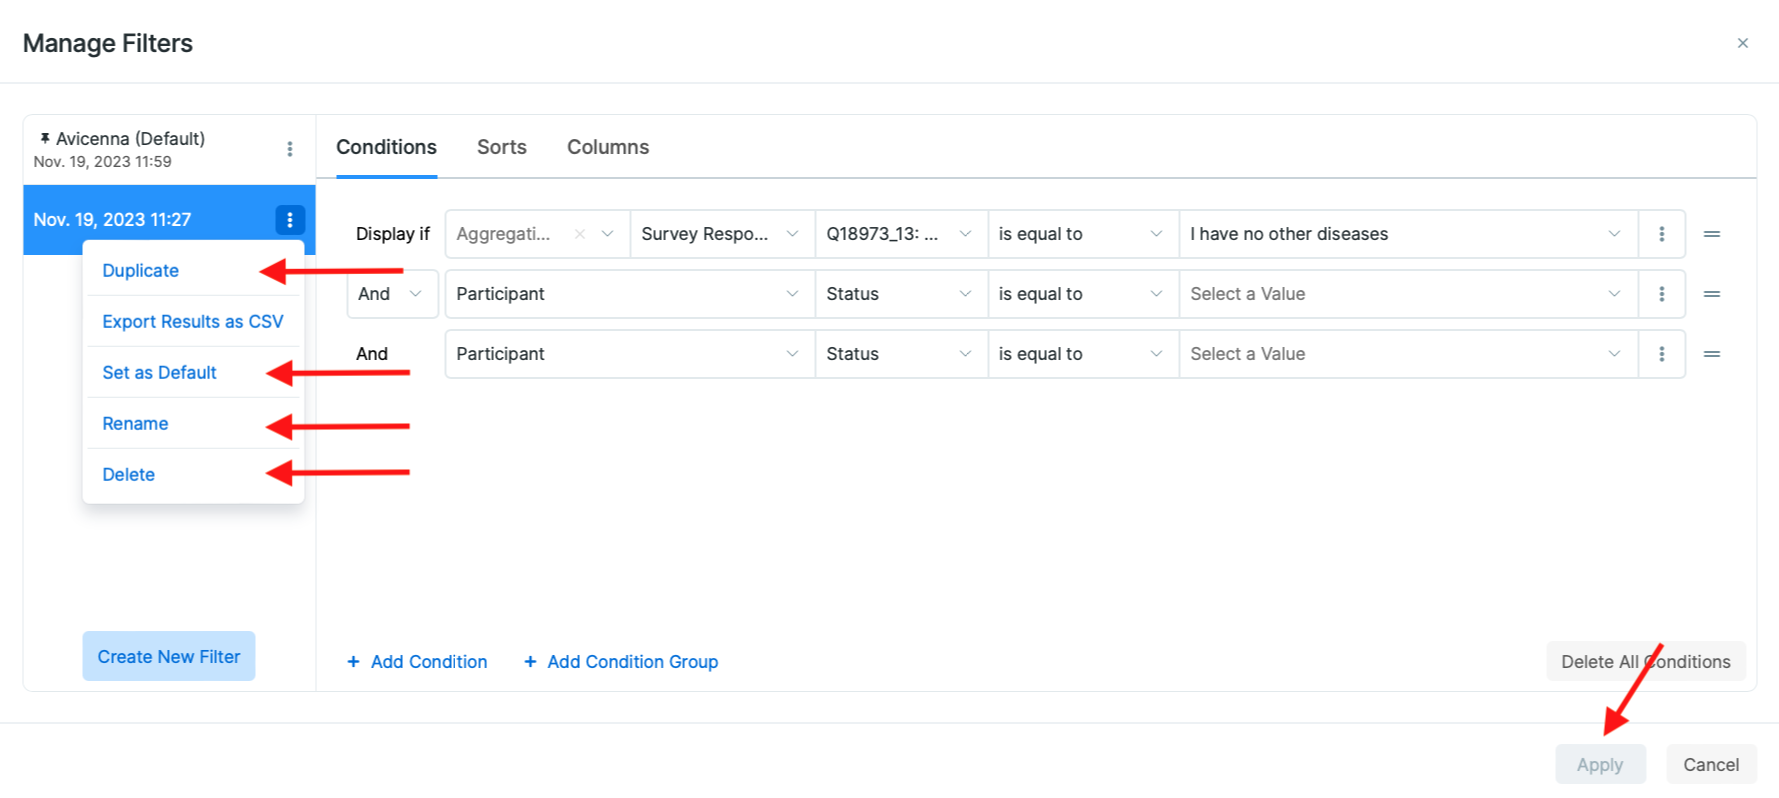
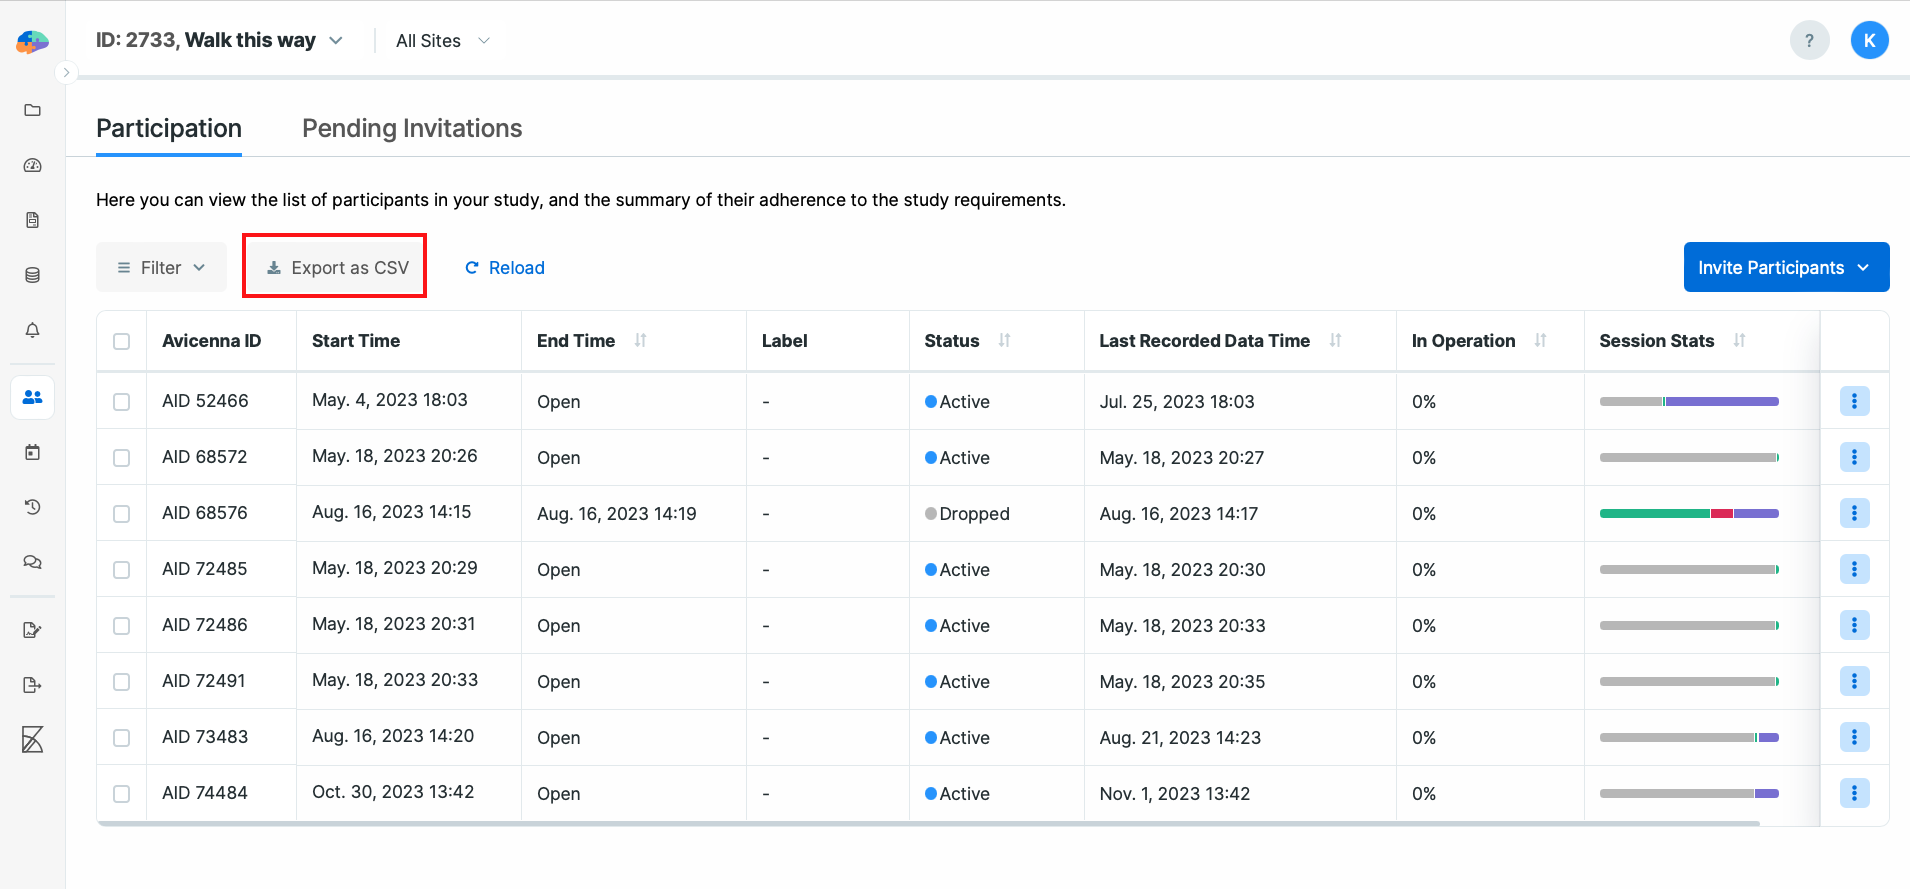
Exporting Filter Results
You can export the filtered data in CSV format for further analysis. Here is two ways to do so:
Without Applying Filter: In
Manage Filters, selectExport Results as CSVfor a chosen filter in 3-dots menu to download the data.
After Applying Filter: Next to the
Filtersdrop-down, useExport as CSVbutton to download the data as per the currently applied filter.