Enrollment
Participants can join your study by installing the Avicenna app on their Android or iOS phone or tablet. Alternatively, they can use Avicenna for the web through their phones' or laptops' browsers.
Avicenna Participant App
Participants can use any of the following to sign up and join a study:
Avicenna for iOS supports iOS version 13 and above, which is reported to cover more than 99% of all iPhone devices. Avicenna for Android supports Android version 4.2 and above (API version 17+) which covers 99.2% of Android devices. These percentages ensure that almost all participants can join your study regardless of the type of phone they own. Therefore, you do not have to introduce selection bias during the enrollment based on the device type. Additionally, participants can access Avicenna through the web-based interface, and use that to join your study.
Avicenna offers almost identical features across Android, iOS, and the Web, ensuring a comparable experience for participants regardless of the platform they use. However, certain platform-specific features, such as sensor-based data collection or in-app notifications, may vary. The availability of each feature is explained in the respective documentation. Unless stated otherwise, you can assume all features described throughout the documentation is available on Android, iOS, and the Web.
Participants can use multiple devices throughout their participation. For example, they can start by using their Android phone and occasionally log in to their account on their personal computer. Then, partly through the study, they can switch to an iPhone device. As long as they use the same account, Avicenna ensures their data is in sync across all of their devices. Furthermore, Avicenna keeps track of the data uploaded from each device. You can use the Participation page to check different devices a given participant has used, and the data uploaded from each device.
Sign up Process
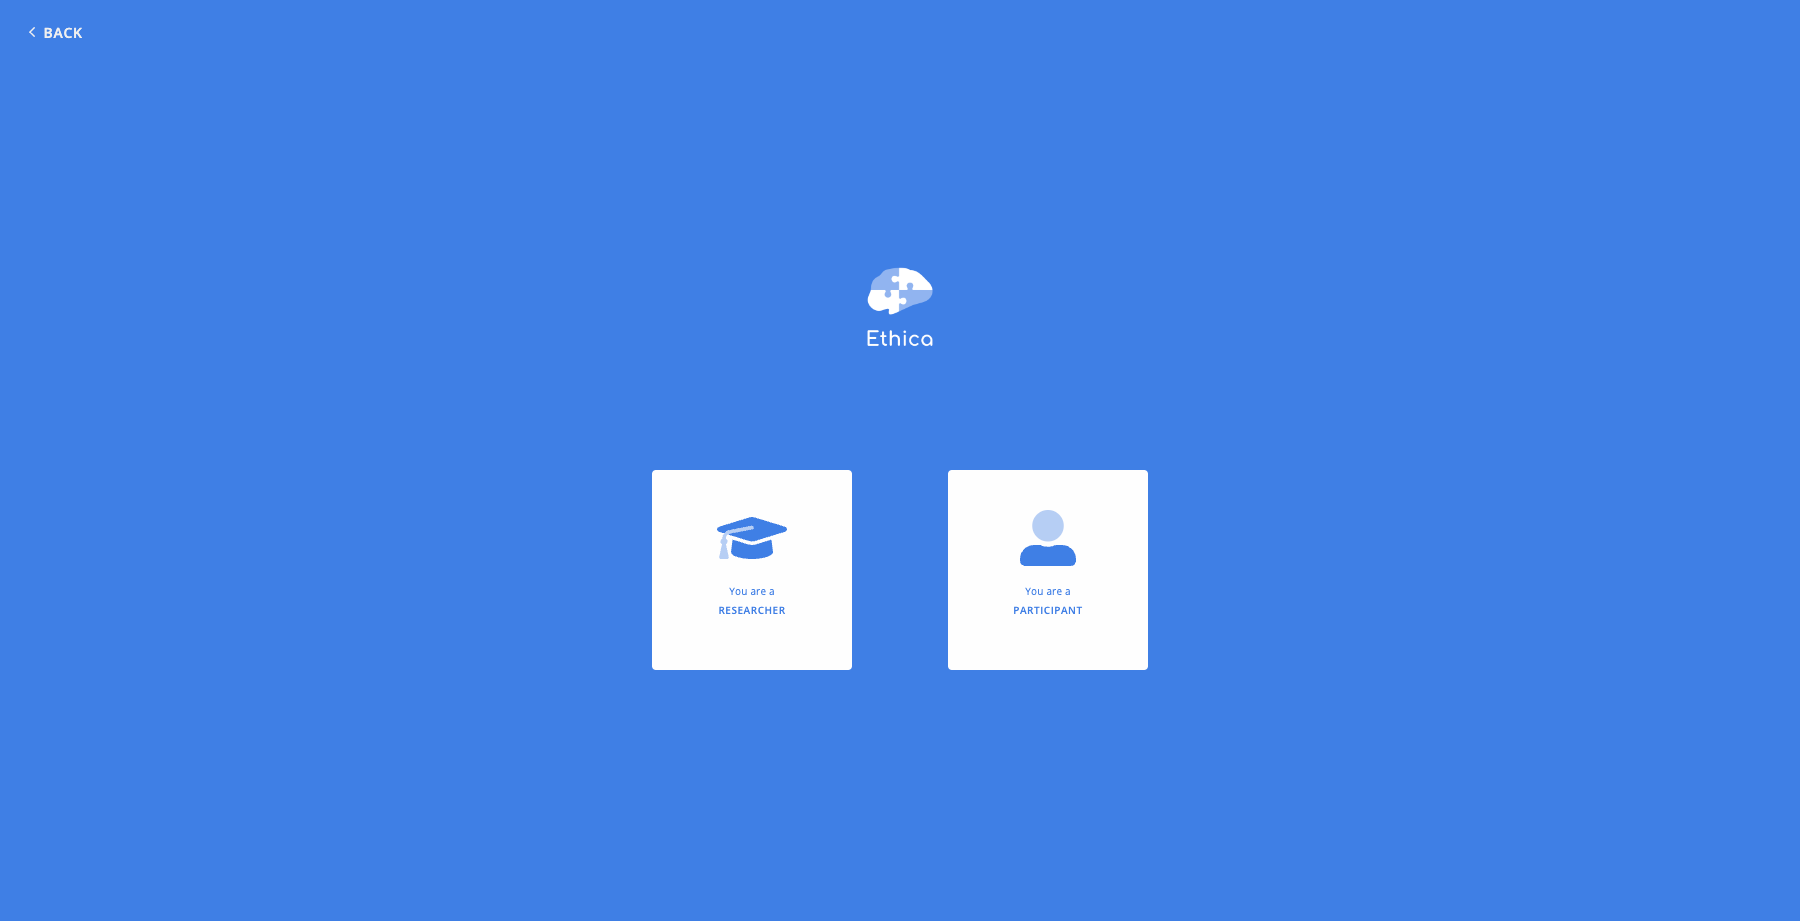
If participants install the Avicenna app on their phones and sign up for a new
account, a Participant account is created for them by default. When signing up
on the web, participants need to explicitly choose that they are a participant,
as shown in the image below:
During the sign-up process, participants are asked to enter their email address and choose a password. These credentials allow participants to access their account and their data from any other devices, such as another smartphone (e.g., when switching phones) or via a web browser. In this case, all their data will start to synchronize with the new device immediately. For example, if a participant was expected to receive a Survey, they will receive it on their new device, as well as any other device they are logged into. This allows participants to continue with the study seamlessly after switching from their phone to their personal computer or if they have to switch phones.
If using email addresses causes privacy concerns in your study, you can instruct participants to use a variation of a catch-all email address. After participants sign up or log in, they will remain logged in until they sign out.
Avicenna also offers a password recovery option. If a participant forgets their password, they can request a password reset link via email.
Study Enrollment
There are 3 ways for a participant to enroll in your study:
Using Registration URL
The easiest way for participants to join your study is by using the
Registration URL. Each study in Avicenna has a unique URL, for example:
This URL which is based on the Study ID points to your study's homepage in Avicenna. You can think of this page as the study's landing page. If a participant has already installed the Avicenna app on their phone, clicking on a Registration URL will take them directly to the study's registration page inside the Avicenna app. Otherwise, if they still don't have it on their smartphones, the link will open on their phone's browser; so, they will see the following dialog asking them if they want to enroll in the study:
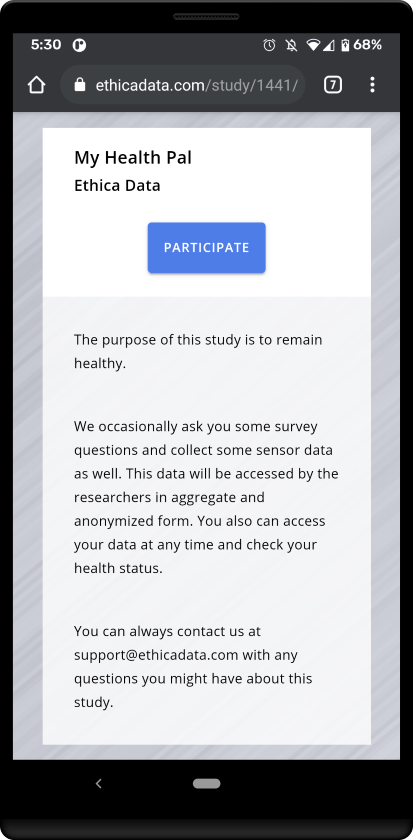
Here, participants can see the name and description of your study to check whether they're on the correct page.
If your study already has a dedicated web page, you can modify it to behave just like the web page shown above. This way, you can use your own web page's URL as the study's enrollment URL, and participants can register for your study by visiting your web page. Please contact Avicenna Support for the required modification details.
If the participant is visiting this page on a smartphone, clicking on the
Participate button will check whether the individual has the Avicenna app
installed. If yes, the Avicenna app will be opened, and the person will be
presented with your study's consent materials. If not, the person will be taken
to the Google Play Store or Apple App Store to install the Avicenna app.
After installing and opening the app, Avicenna will automatically detect the study which the user wanted to join and show a custom welcome screen based on the study:
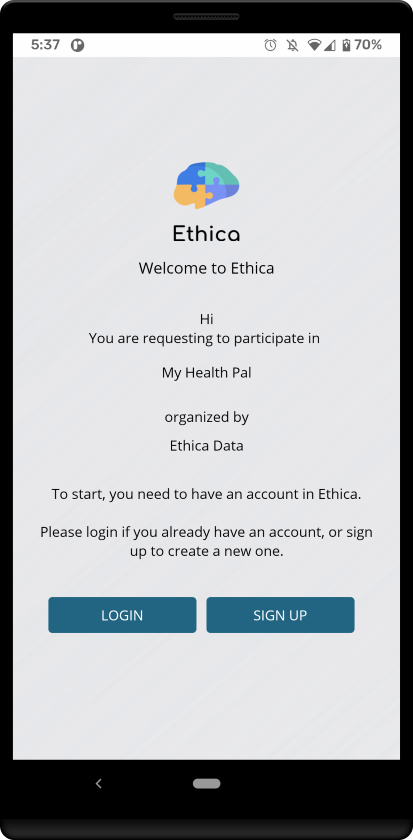
This allows you to brand the Avicenna app for your study from the very first
step. Additionally, there is no need for the user to enter any
Study Registration Code to join your study. As soon as the user logs in or
signs up with the Avicenna app, they will see your study's consent materials and
can continue with the registration.
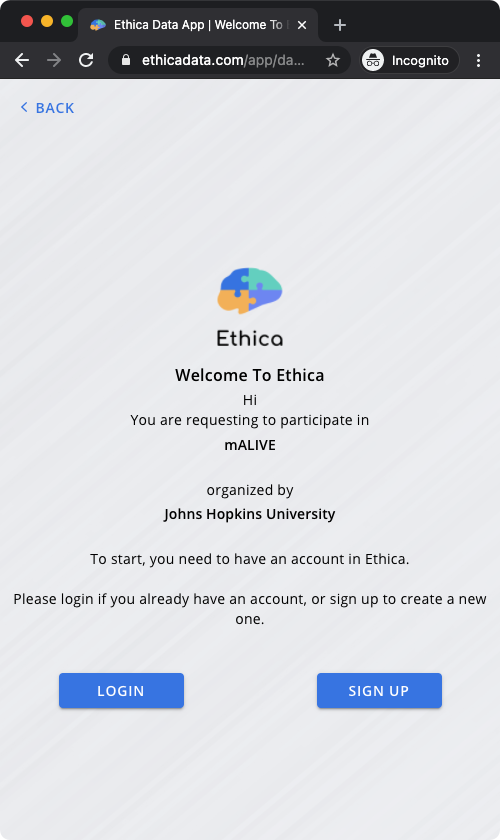
If the participant is not using a smartphone, but using a computer web browser
instead, and they are already logged into Avicenna as a participant, clicking on
the Participate button will take them to the study registration web page. In
case they're not already logged in to Avicenna Research, they'd be redirected to
your study's Welcome page. So, they can sign up or log in and proceed with the
registration process.
Using Registration QR Code
Each study has a unique QR Code that directs to its Registration URL.
Scanning the QR Code with a phone or tablet's camera eliminates the need to
manually enter the URL. For more details on enrollment using the Registration
URL, please refer to the above section.
Using Study Registration Code
Each study has a unique Registration Code, which is the same as the
Study ID. Participants can enter this code inside
the Avicenna app to join your study. You can find the study's Registration Code
on the Basics page located on the Researcher Dashboard.
Enrollment Types
You can use the Enrollment Type on the Basics page to specify who is allowed
to join your study. The Enrollment Type can be set to one of three options, as
explained below.
Public
This option makes the study accessible to the public. Anyone can join the study provided they have the study's Registration Code or URL. Despite this, you can still invite specific participants to join your study through the Invitation-based enrollment type. However, having an invitation is not a requirement for joining.
Invitation-based
In contrast to Public studies, where anyone can join,
Invitation-based studies require that individuals be specifically invited
before they can participate. To invite individuals to the study, you must have
their email addresses. It's important to note that invited individuals are not
required to have an Avicenna account at the time of invitation. However, they
must create an account using the email address to which the invitation was sent
to join the study.
For details on how to invite participants to your study, please refer to the Invite Participants section.
Closed
If you do not wish to enroll any new participants in your study, either
temporarily or permanently, you can set the study status to Closed. This will
prevent any individuals, whether they have been invited or not, from joining
your study. You can change the status of your study to Closed, or from Closed to
other statuses, at any time.
Invite Participants
When the enrollment type of your study is not set as Closed (i.e. it's either Public or Invitation-based), you can invite new participants to join your study. The Participation page offers you four options to invite new participants. You can invite participants by:
- Sending them an invitation email
- Sending them the Registration URL
- Sending them the Registration QR Code
- Sending them the Study Registration Code
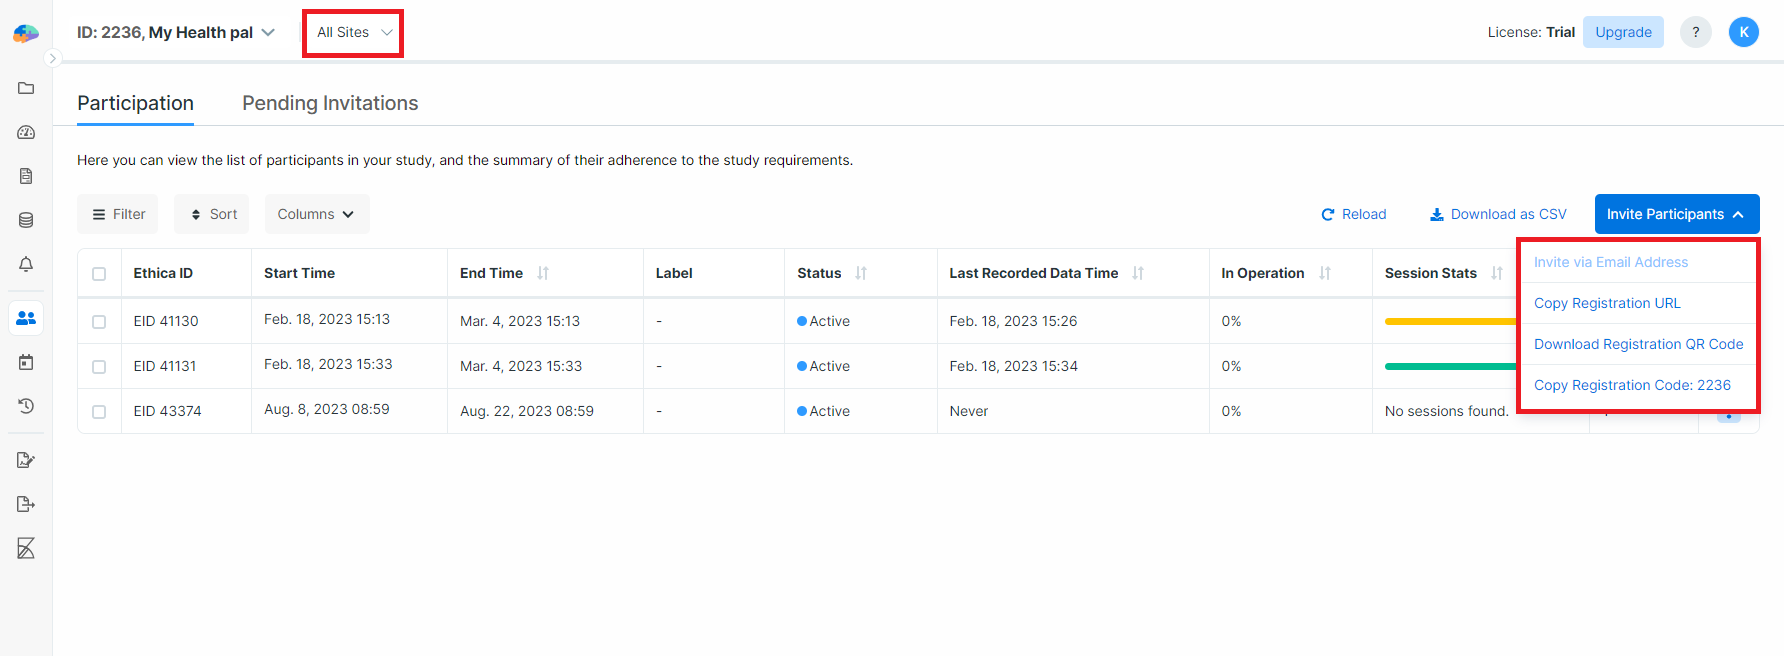
In the screenshot above, our study has more than one site. That's why you can
see the Invite via Email Address button has grayed out until a site is chosen
from the site selector at the top of the page.
In a multi-site study, if you are inviting participants to a certain site, when they join the study, they will automatically be assigned to that site.
Clicking on the Invite via Email Address will open the Invite Participant
dialog.
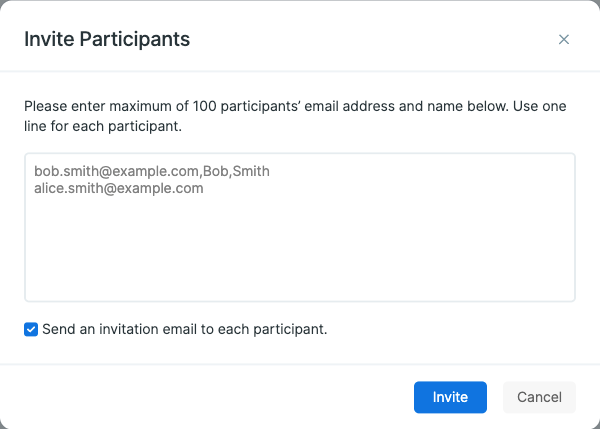
Here you can enter the list of participants you want to invite. You can enter up to 100 names at once, each in a separate line. A given invitation must start with the email address of the invited participant. It can also include the first and last names of the individual, though it's not mandatory. The following lines each represent a valid invitation entry:
bob.smith@example.com,Bob,Smith
alice.smith@example.com
After you enter all the invitations, you can press Invite to create the invitations. Shortly after pressing Invite, Avicenna will show another dialog with the result of the invitations.
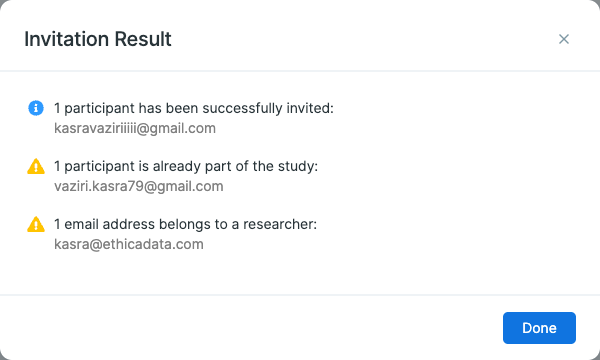
As you can see in the image above, invitations are either created successfully or have failed due to one of the following reasons:
- The individual you have invited is already registered with Avicenna as a researcher. Avicenna does not allow researchers to participate in a study (learn more about this).
- The individual you have invited is already part of this study. Therefore, you cannot invite them to join the study again.
If, while creating the invitations, you chose to send an email to participants about their invitation, Avicenna sends them an email with the URL to join the study. By default, the content of the email will be the following:
Email Subject:
Study invitation: {{Your study name goes here}}
Email Body:
Hi {{Individual's first name, if available}},

{{Your name goes here}} from {{Your organization name goes here}} has
invited you to join "{{Your study name goes here}}" research study.
Please click on the link below to download the Avicenna app and join
the study:

{{Registration URL will be placed here}}

If you don't have the Avicenna app installed, the above link will ask
you to download it first.

If you have any problem with the link, you can just directly download
the Avicenna app from Google Play or App Store, and after you register,
join the study using registration code {{Your study registration code goes here}}.

Also, please make sure you use {{Participant's email address which is
invited to the study goes here}} as your email address while registering.

Thanks for helping advance the science,
The Avicenna Research team
See Notification Templates for more details on how to customize the content of the invitation email.
Before inviting participants, you need to have the email address of the individuals you want to invite to the study. While invitees don't need an Avicenna account at the time of invitation, they must create one using the invited email address to join the study.
Pending Invitations Tab
The Pending Invitations tab on the Participation page will
be visible when there is at least one invitation pending. Any sent invitation
will be added to the invitation table first. Once a participant joins the study,
their invitation entry will be removed from that table, and you can find them in
the Participation tab.
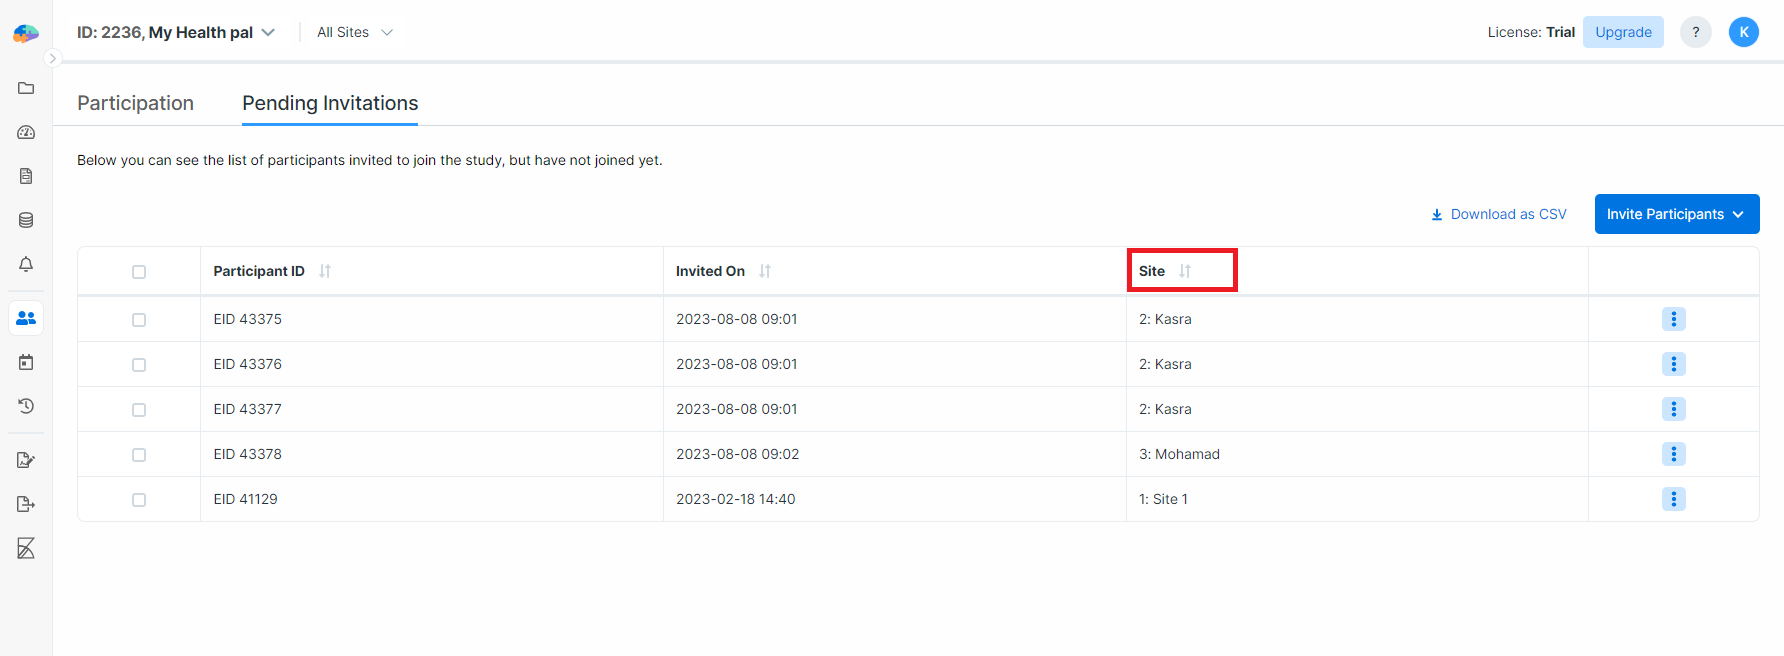
In the image above, you can see two main details: the Participant ID and the
date and time they were invited, labeled as Invited On. If you want to know
which site each participant is invited to, simply select the All Sites option
from the site selector. This will add an extra column called Site to the table.
But, if you pick a specific site from the dropdown, the Site column will
disappear because it's only showing invites for that one site.
Also, if showing personally identifiable information is enabled for your study, you will be able to see the email address, and first and last names for each invitation.
On any other page of your Researcher Dashboard, and in any other part of the system, you will not see the email addresses or the names of the participants. Instead, you will see their labels or IDs.
To delete or resend invitations, click either on the checkboxes beside the
Participant IDs you want to take action on or on the ellipsis menu at the end of
each row. Then, select the action that you want to perform, either Delete or
Resend Invitation.